Filtering overview with ffmpeg
Filtering overview
FFmpeg supports many audio and video filters. Currently, there are 116 audio and 286 video filters, but there are a bit more if we count the hardware accelerated ones too.
So how do we leverage them?
There are two ways to define filters, but I’m going to explain the complex filter, as the difference is not much, but it is more versatile. So there is a global option for FFmpeg, called: -filter_complex. With quite a weird syntax, you can specify all your filters and their parameters right after this option.
You can imagine the process with the following image:
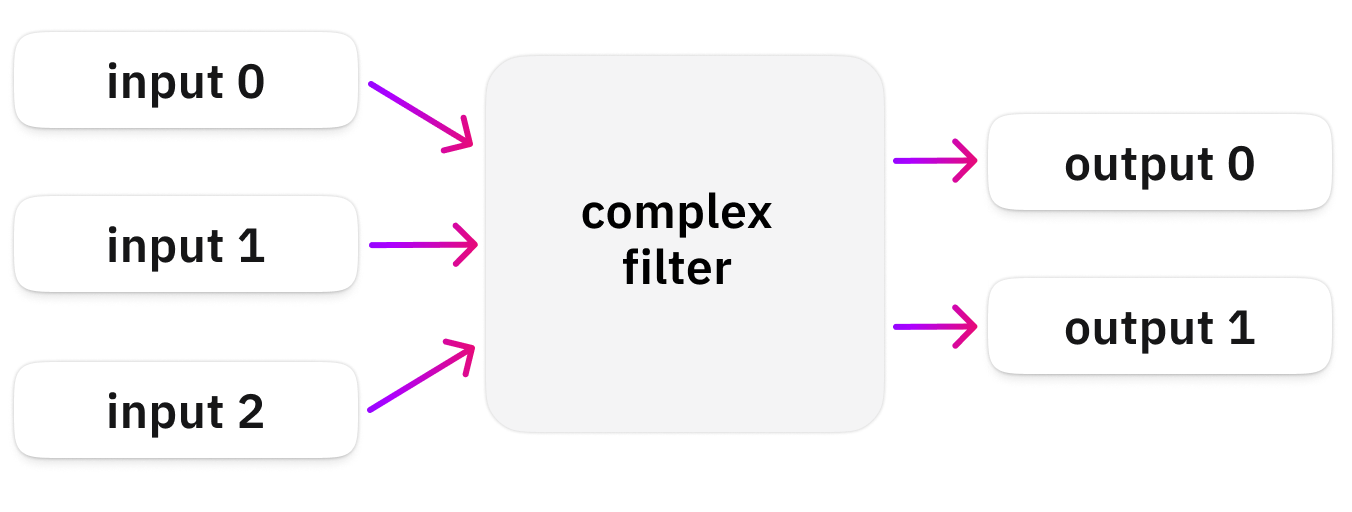
Basically, your filter graph can access all the inputs (-i a.mp4 -i b.mp4 -i c.mp4), and it can produce as many outputs as you like (-map might be needed).
Basic syntax
Let’s take a look at a simple, basic example:
ffmpeg -y  -t 5 \
-i bbb_sunflower_1080p_60fps_normal.mp4 \
-filter_complex "drawtext=text='HELLO THERE':y=20:x=30:fontsize=200:fontfile=/usr/share/fonts/truetype/freefont/FreeSerif.ttf" \
filter_complex1.mp4
Although -filter_complex is a global option, I like to put it after the inputs and before the outputs as it is a bit easier to overlook the whole command that way. Thankfully the command line parser of FFmpeg is smart enough, and it works.
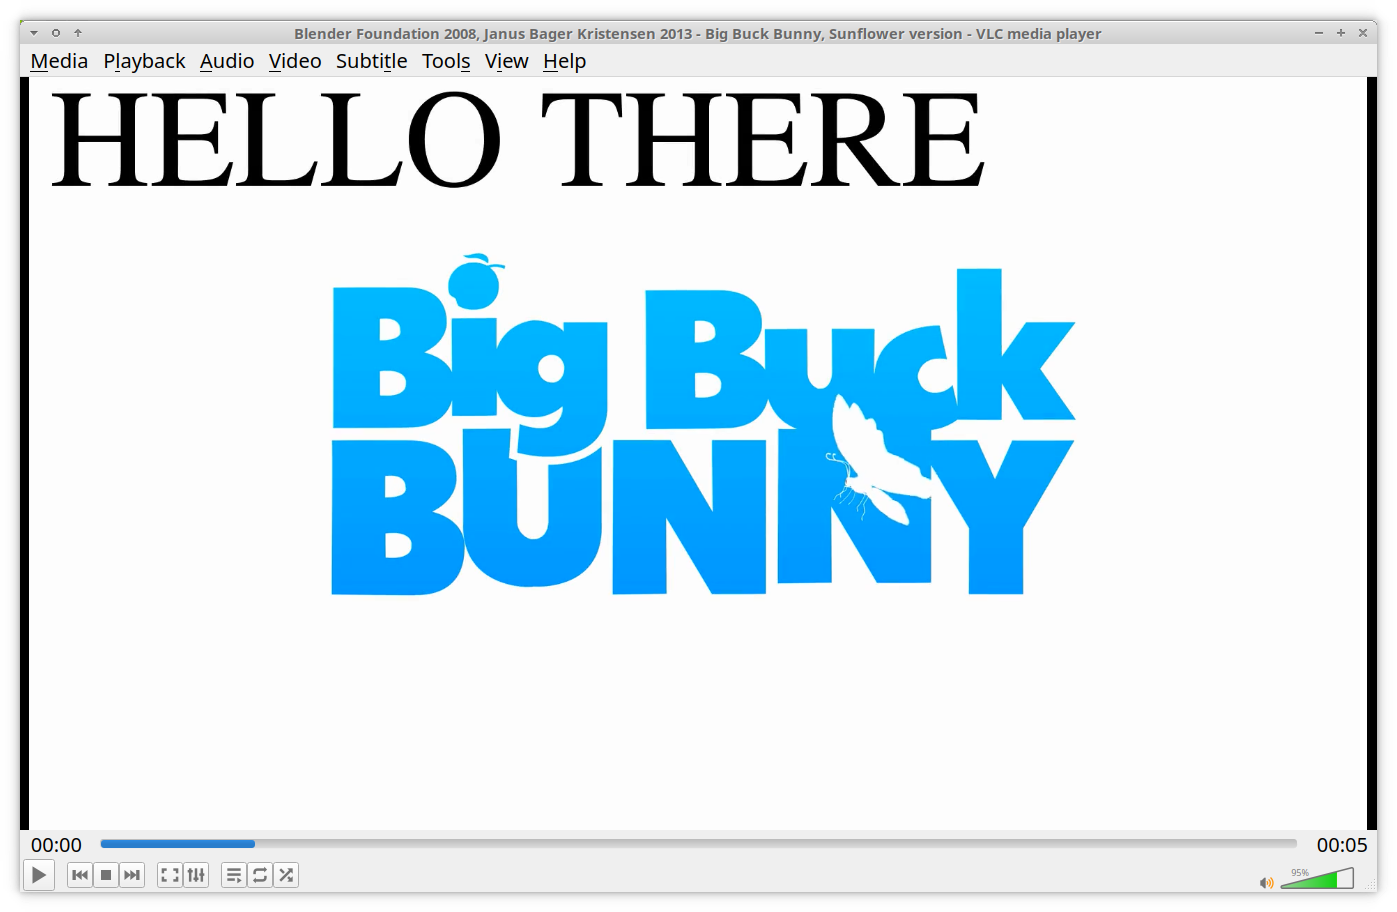
The command above produces a 5-second-long video, where the text “HELLO THERE” is overlaid on the intro of Big Buck Bunny.
Let’s understand the weird format for specifying filters!
We’ll go bottom-up, and we’ll build it from there. So the most basic format is this:
FILTER_NAME=ARGUMENT1=VALUE1:ARGUMENT2=VALUE2For example:
drawtext=text='HELLO THERE':y=20:x=30The first thing before the first equal (=) sign is the filter’s name, which is the drawtext filter in this case. Then we have our first argument, “text” and its value “‘HELLO THERE’“. Right after that, separated with a colon (:) comes the next argument, “y” with a value of “20”.
You can guess what each of the text, y, x, fontsize and fontfile arguments do, as it is quite self-explaining. But especially for the first time, you’ll heavily rely on the filtering documentation to understand every filter and every argument.
Also, several characters are reserved, such as: , : = and a few others depending on your environment, so sooner or later you need to learn about escaping too.
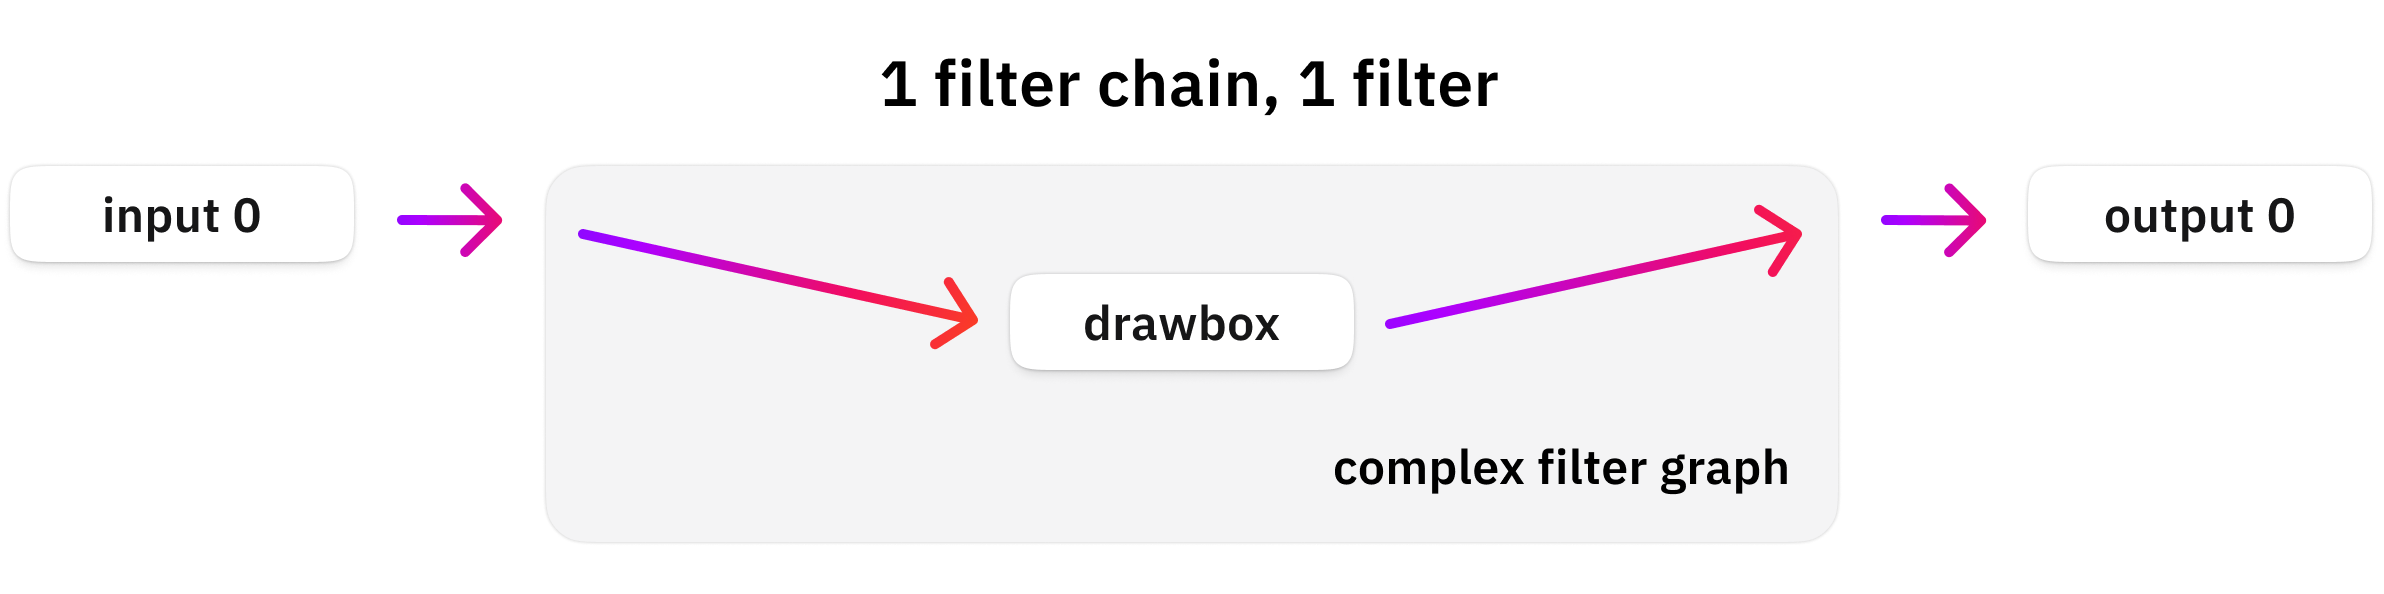
To recap, our pipeline looks like this now:
Multiple filters in a chain
This previous command is a single filter chain that consists of a single filter only, but you could have more filters put right after each other! It means that the output of one filter will be the input for the next! The way to do this is by separating them with a comma!
Let’s draw two boxes with the drawbox filter!
ffmpeg -y -t 5 \
-i bbb_sunflower_1080p_60fps_normal.mp4 \
-filter_complex " drawbox=x=10:y=10:w=100:h=100:color=red , drawbox=x=200:y=200:w=100:h=100:color=blue " \
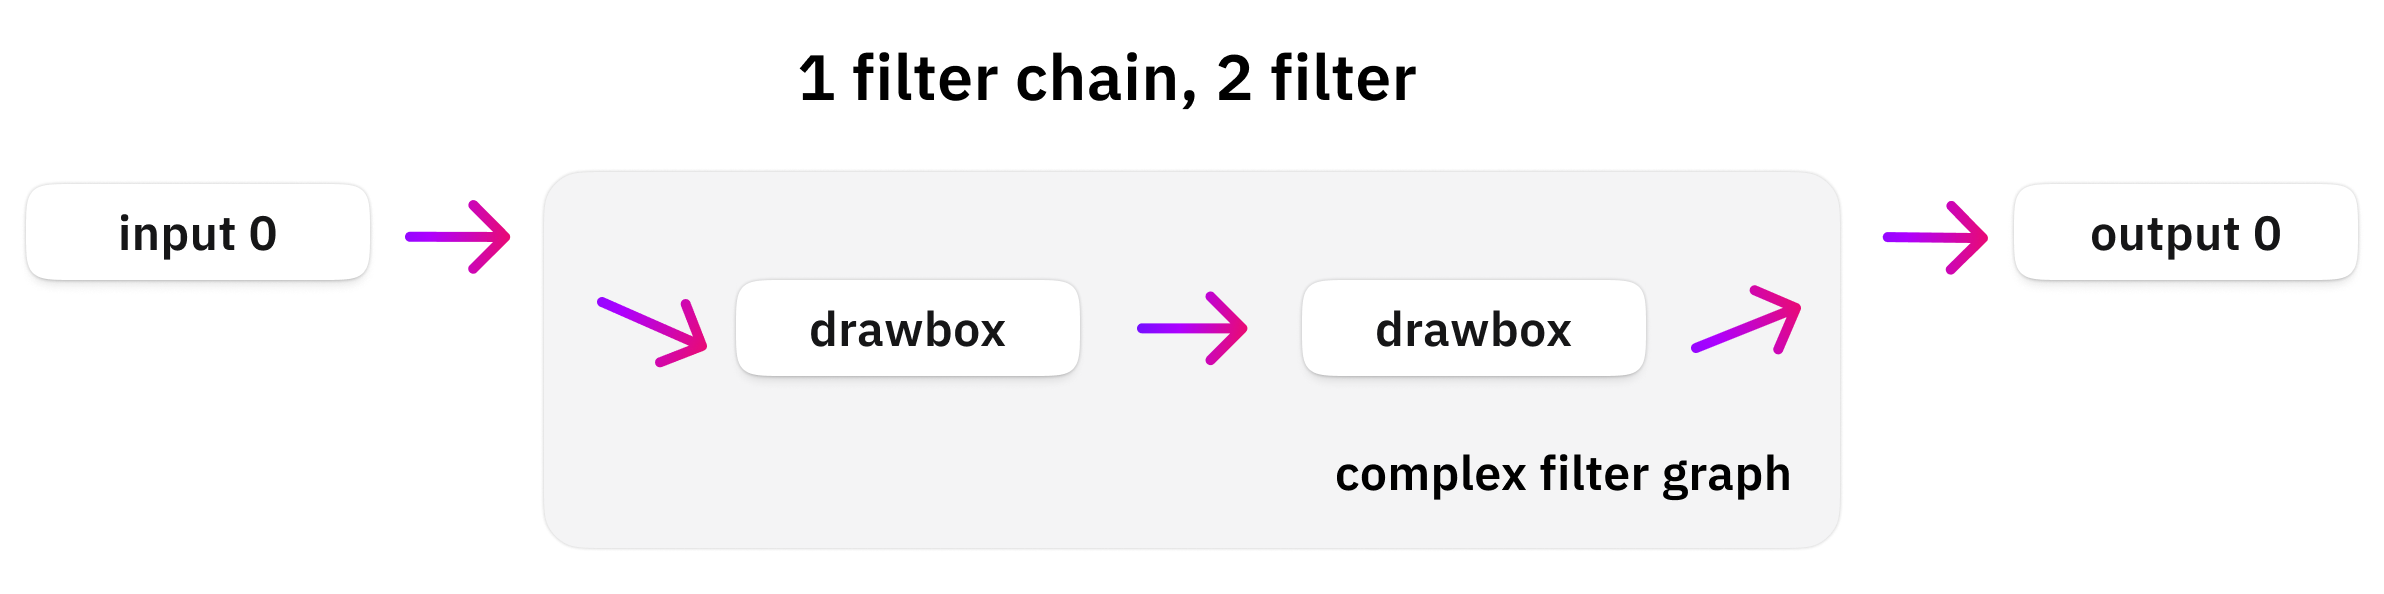
filter_complex2.mp4See? The output of the first filter is passed to the output of the second filter!

Let’s visualize our pipeline again:
Input and output pads
Now, we have skipped something this far, because for simple uses FFmpeg is smart enough to do it for us. And this is the specification of a chain’s input and output pads!
Let’s draw just a single rectangle for now:
ffmpeg -y -t 5 -i bbb_sunflower_1080p_60fps_normal.mp4 -filter_complex "drawbox=x=10:y=10:w=100:h=100:color=red" filter_complex3.mp4FFmpeg sees that the input for our filter chain is a single video file, and the output is a single output video file. Therefore, it safely assumes that we want that single input as the input of our single filter chain. And that single output should be the single output of our single output chain.
That’s really nice, as, in simple situations like this, we don’t need to assign and map inputs and outputs manually! But when we get more inputs, filter chains, or outputs, it is no longer possible. Therefore, we need to understand how to assign inputs and outputs!
First of all, let’s compare the following two command lines. They result in exactly the same result, but the second one represents what FFmpeg does internally (roughly):
ffmpeg -y -t 5 -i bbb_sunflower_1080p_60fps_normal.mp4 -filter_complex "drawbox=x=10:y=10:w=100:h=100:color=red" filter_complex3.mp4
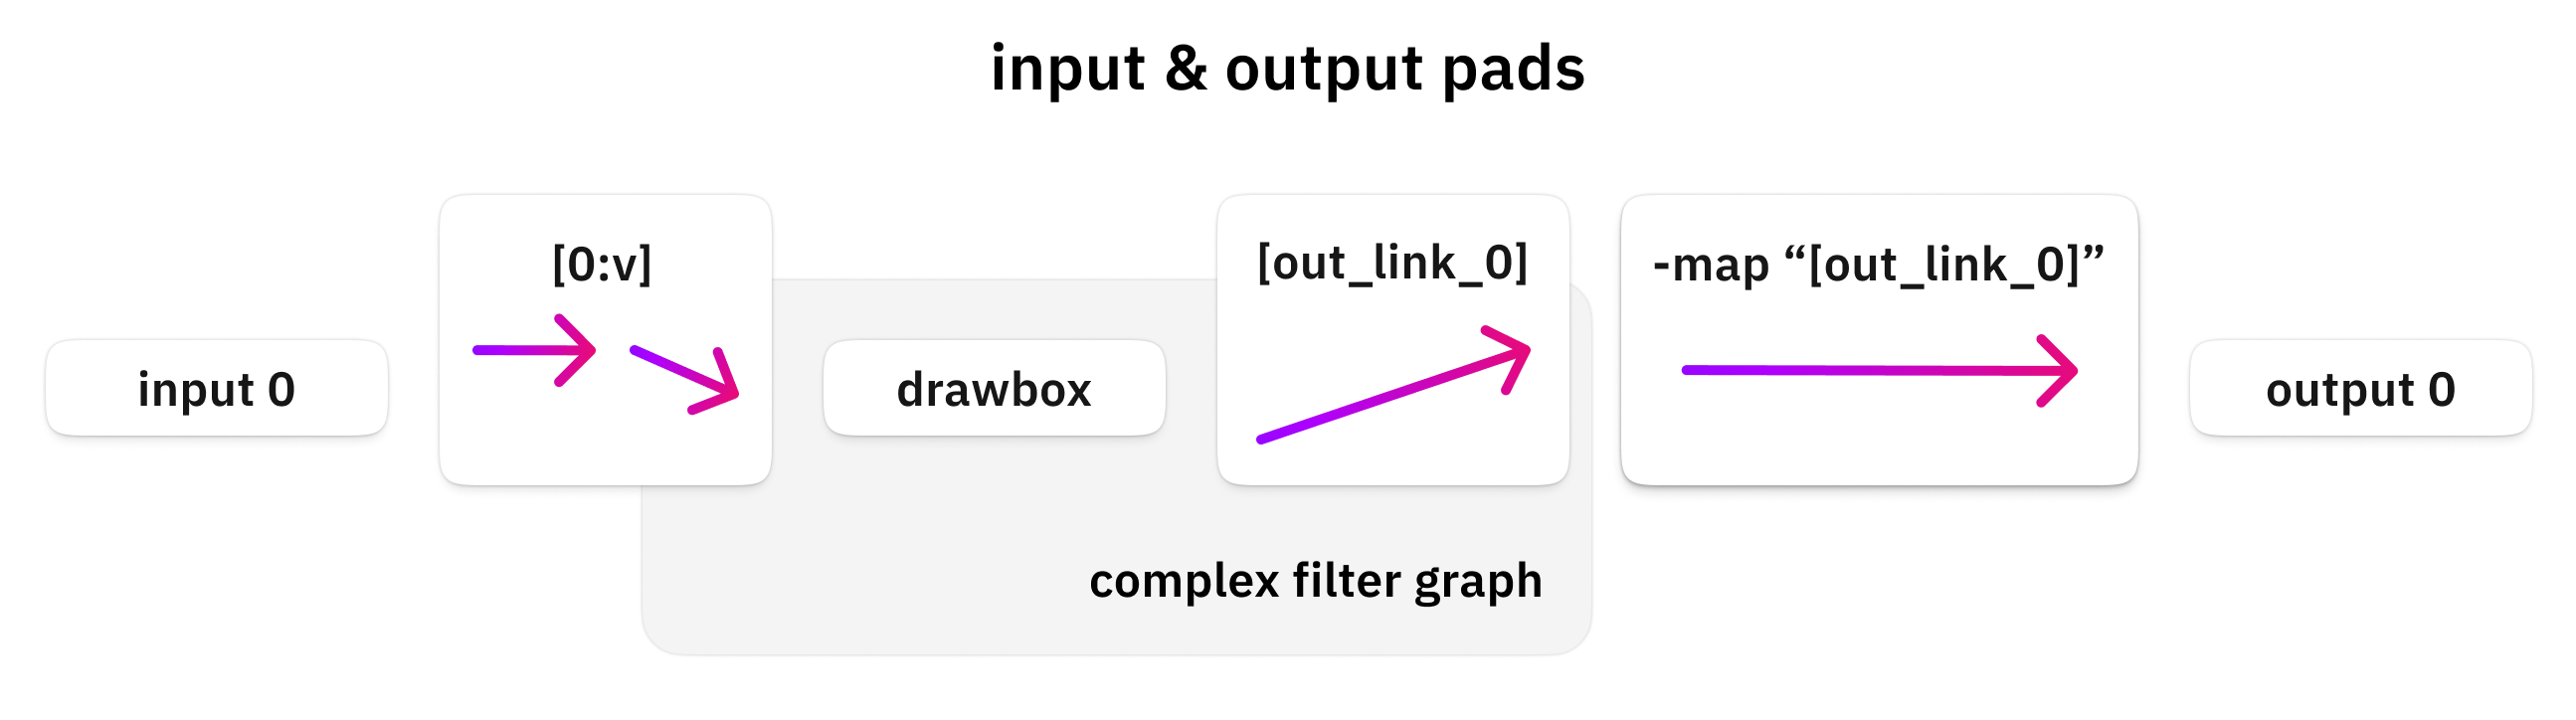
ffmpeg -y -t 5 -i bbb_sunflower_1080p_60fps_normal.mp4 -filter_complex "[0:v]drawbox=x=10:y=10:w=100:h=100:color=red[out_link_0]" -map "[out_link_0]" filter_complex3.mp4Do you see the difference? Before our filter chain, an “input pad” is defined: [0:v]. The expected format between the square brackets is documented in the stream selection section of the official documentation, and this article already covered it.
But, a quick summary:
- 0:v: This means the first video stream of the first input file.
- 0:v:0: Means exactly the same thing but in a long form.
- 0:0: Means the first stream of the first input file (not recommended, as it could be anything in theory. It could be a subtitle stream, a thumbnail, a video or an audio stream…)
- 0:a: This means the first audio stream of the first input file.
- 0:a:0: Means exactly the same thing but in a long form.
- 0:a:1: Means the second (index #1) audio stream of the first input file.
So we can specify which input file should be connected to which input of the filter graph!
Also, something similar is going on at the end! Do you see, the [out_link_0] output pad definition at the end of our filter chain?
The naming here is easier, as basically you can specify any arbitrary name in here. It roughly means, “please store the output data under this name”.
And when you specify your output file, you can or need to map it by selecting one of your filter graph outputs! Therefore, we must add the -map “[out_link_0]” option before our output file.
This map option means this: “Please save the data stream with this name into the following output file.”
This is how you can visualize this input/output mapping:
Multiple chains
Coming from the previous sections, you are now ready to see and understand an even more complicated configuration, which has multiple input files, output files, and filter chains!
ffmpeg -y  \
-i train.jpg \
-t 5 -i bbb_sunflower_1080p_60fps_normal.mp4 \
-filter_complex "[0:v]drawbox=x=10:y=10:w=100:h=100:color=red[train_box] ; [1:v]drawbox=x=10:y=10:w=100:h=100:color=red[bbb_box]" \
-map "[train_box]" filter_complex4_train.jpg \
-map "[bbb_box]" filter_complex4_bbb.mp4
Let’s see the output (two files next to each other):
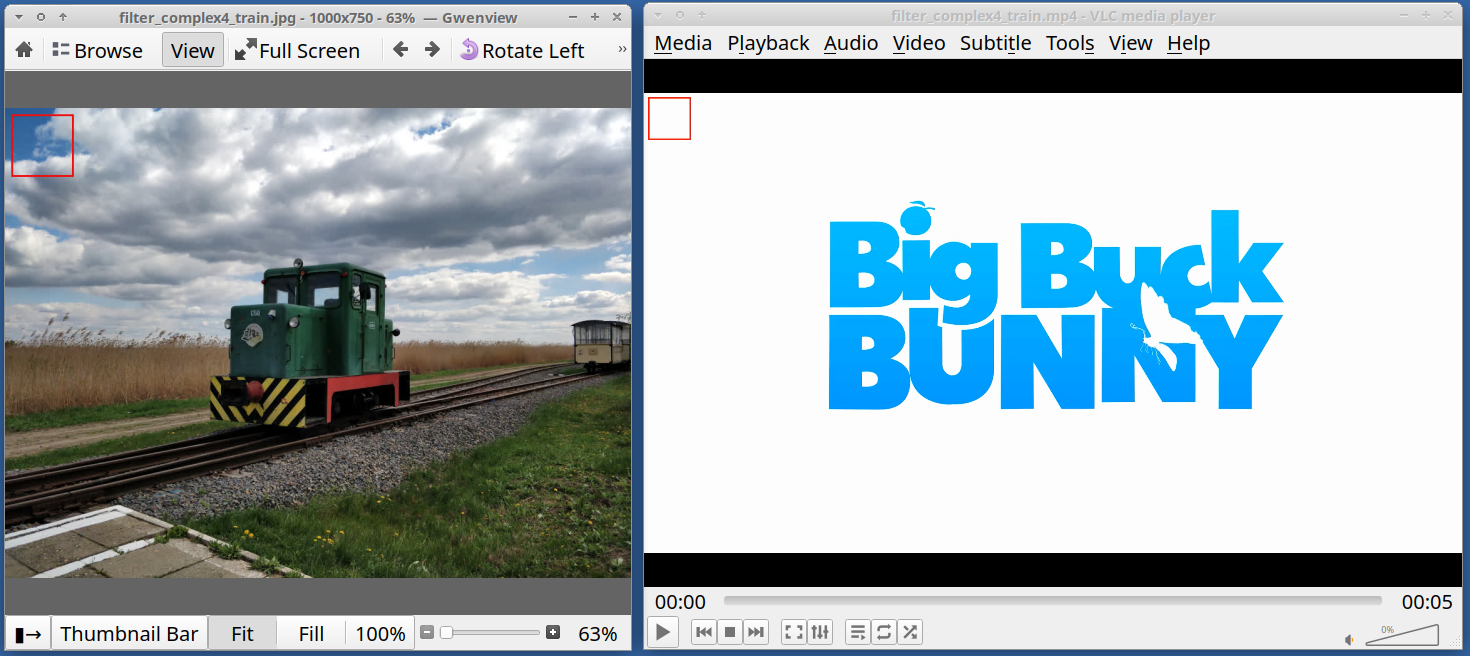
We had two inputs, and we got two output files, an image, and a video, with a red rectangle on them, with a single command!
Are you still here? I hope! Let’s understand what happened in that crazy command! We have two input files:
- -i train.jpg: A simple image file
- -t 5 -i bbb_sunflower_1080p_60fps_normal.mp4: Our video file, but to make it quick, just the first five seconds of it
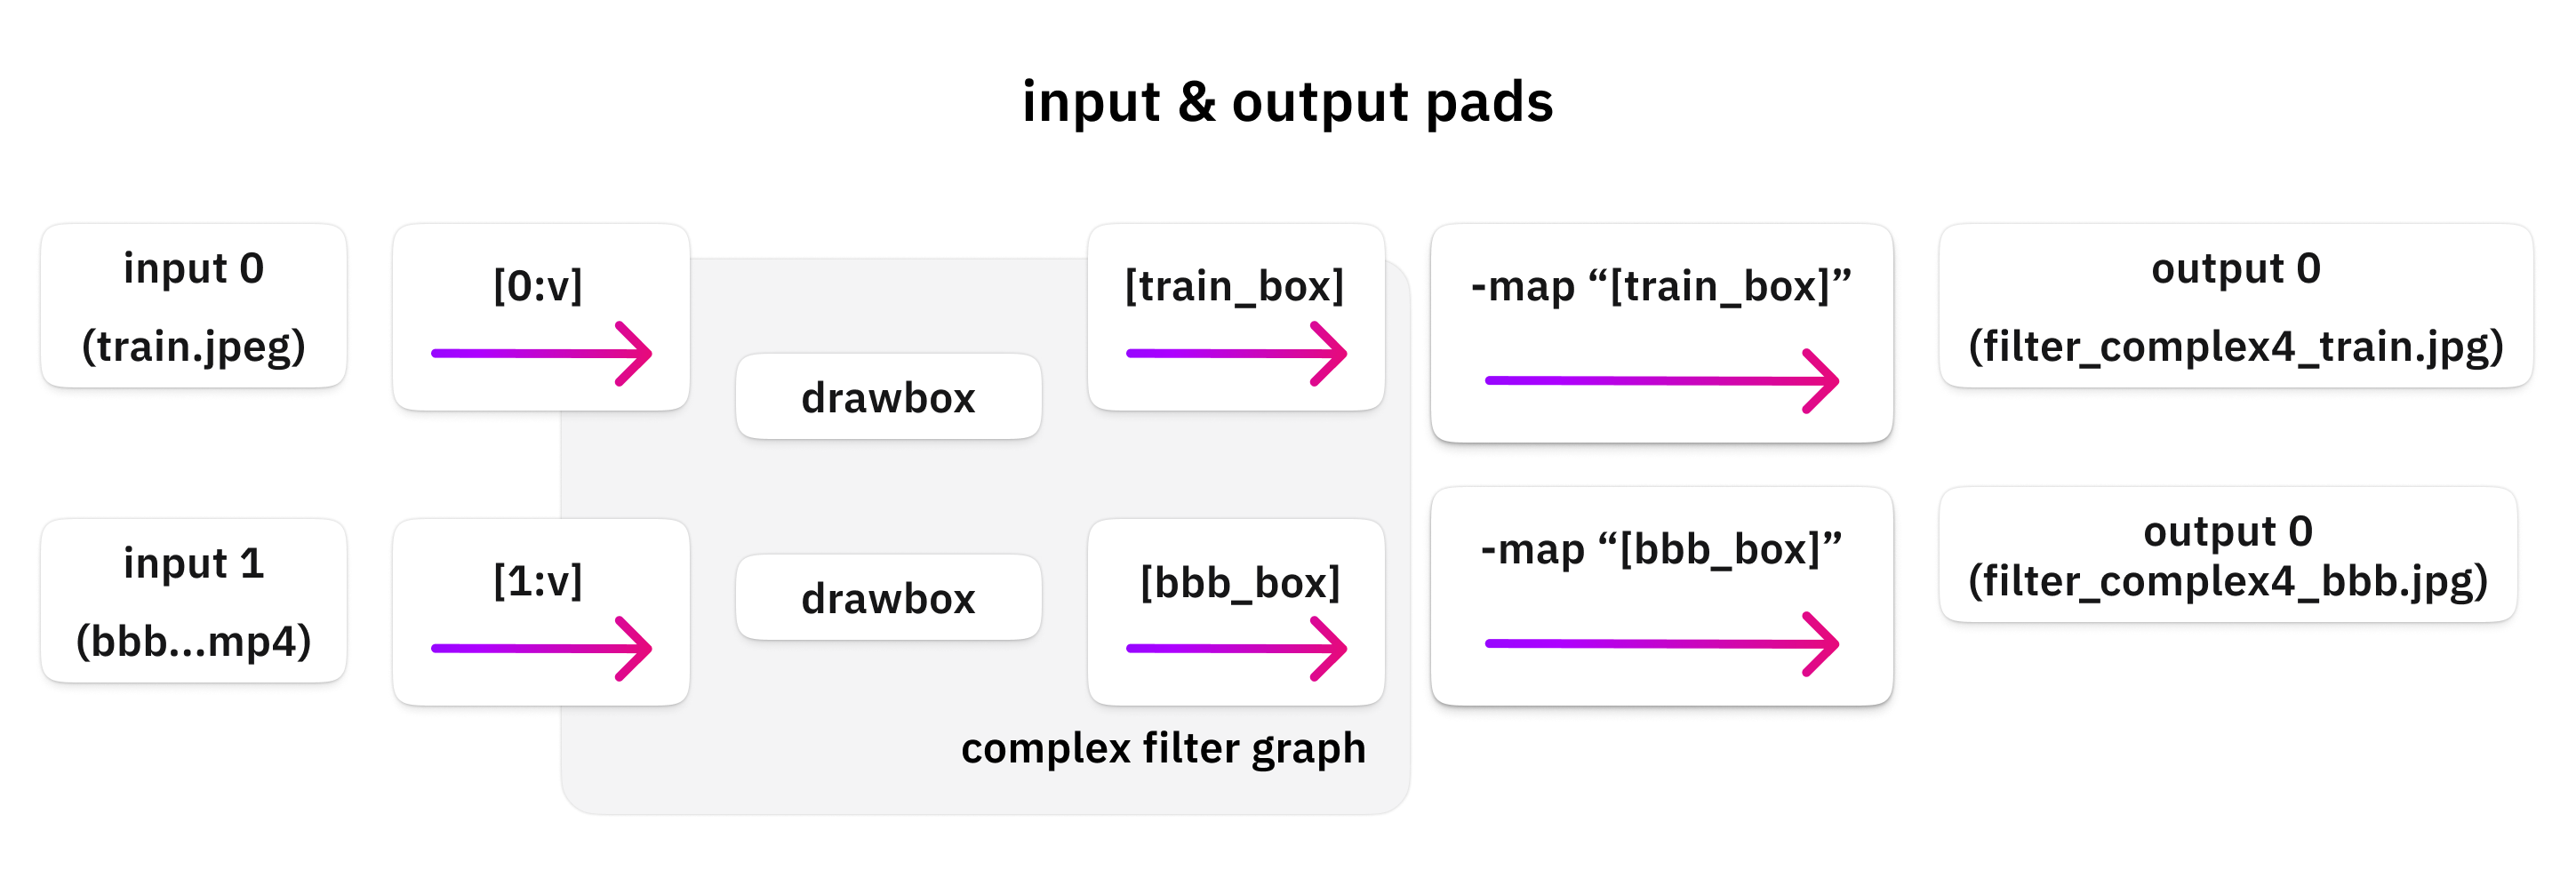
Then the first thing to note is that we have two filter chains! They are separated with a ”;“.
Our first filter graph is this: [0:v]...[train_box]
- This requests the first input file as an input
- Draws a red box
- Saves the output into the “train_box” output pad
Our second filter graph is this: [1:v]...[bbb_box]
- This requests the second input file as an input
- Draws a red box
- Saves the output into the “bbb_box” output pad
And finally, we got two outputs, each mapping to one of the outputs of the filter graph:
- -map “[train_box]” filter_complex4_train.jpg
- -map “[bbb_box]” filter_complex4_bbb.mp4
Here is the same thing visually:
If you are thinking about making it even more complex and making filter graphs that combine multiple inputs into one for example, you are on the right track! It is possible, and we will get to that!
This was the introduction to the filtering system and its syntax.